I put the instructions on a separate page. Read it then come back to this page and read on.
This is the step where you configure the Network Address Translator services (natd or NAT) to forward connections to the internal interface when they come to the outside interface pppoe0. There is a graphical utility called gNAT that can do similar things but I have not used it.
First, get the files necessary for /Library/StartupItems/ here and save them in your home directory. Open a terminal and type:
|
This installs the files you need to start natd when you reboot as well as some configuration files. It does not always start though, and I don't know why. If it does not, start it manually. The natd.conf file (which should probably be kept in /usr/local/etc/ but is in /Library/Startupitems/NAT/) contains the following:
|
which tells natd that the address is dynamic and will change from time to time, that your outside interface (the one connected to the outside world) is pppoe0 and finally the real meat is the last line: every Appletalk connection attempt to port 548 on the outside interface will be forwarded to your internal interface 192.168.0.1 (which you configured above) on the same port 548. natd will take care of all sorts of things to make it happen.
One last thing: you need to enable forwarding so that natd can do its job, so in a terminal, do the following to activate it now:
|
and modify the config file hostconfig so that next time you reboot, it is already activated:
|
and modify the line IPFORWARDING=-YES- instead of -NO-. Type control-X to save your work.
Now comes the part that can be done quickly and wrong, or slowly and right. Pick yours.
You have to configure the firewall even if it is doing very little: NAT requires the firewall to be running to divert the packets. It does not have to do anything complicated if you don't care about security. If you don't care, go to the terminal and uncomment the lines in /Library/StartupItems/NAT by using pico:
|
That will get you going. However, your computer is wide open to anybody who might want to sneak in.
If you do care about security though, you should set up your firewall properly with good rules. Follow the instructions and come back here. Make sure that:
Both setups do the same essential work: anything that goes through the outside interface is analyzed by natd before it is reinjected in the firewall ruleset (for any rules that follow the divert rule). The quick and dirty solution just takes everything that comes in and out, translates it if necessary and moves on. The more complicated but much safer solution analyzes the packet before translating it (for any spoofing attempts), then translates it and if it is allowed will let it through. The key here is that after the divert rule in the firewall, the filtering does not start all over again from rule one but goes on from where it left off (that is, right after the divert rule).
|
If you have used option (1) for the firewall and have uncommented the lines mentionned above in /Library/StartupItems/NAT, then you are done because natd started the firewall for you. If you used the instructions (2) from this page for the firewall, then simply disconnect and connect using the Internet Connect Application. If you have a static IP address and also used the instructions (2) from this page, then type:
|
Next time you reboot, it will start automatically and you will not have to start it manually.
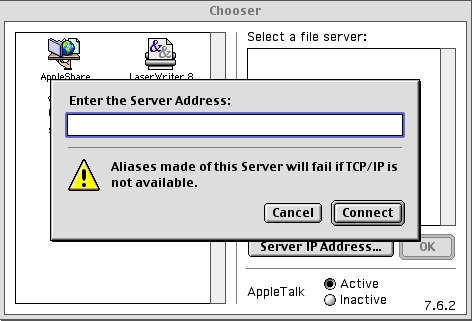
From anywhere on the Internet, you can now connect to your Computer using the chooser or the Connect To Server... menu. You need to know your IP address though. I personnally use www.dyndns.org with software from Julien Jalon.
Things might not work the first time because my instructions might not be as clear as I would like them. Here is a list of things you want to double-check, in no particular order: